Surface Integrity in Aviation Parts Processing
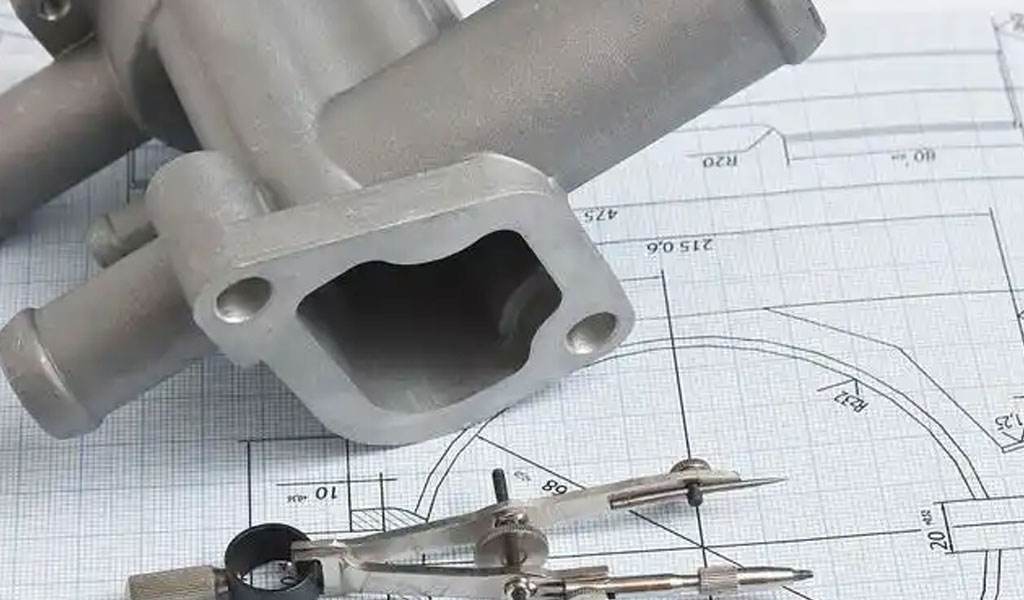
Surface integrity is a critical concept in the manufacturing and processing of aviation parts, encompassing the physical, mechanical, and chemical properties of a component's surface and subsurface layers after machining or other processing methods. In the aerospace industry, where safety, reliability, and performance are paramount, surface integrity directly influences the fatigue life, corrosion resistance, and overall durability of components. This article provides a comprehensive examination of surface integrity in aviation parts processing, covering its definition, influencing factors, measurement techniques, processing methods, and their impact on performance, alongside comparative analyses and future trends.
Introduction to Surface Integrity
Surface integrity refers to the condition of a surface and its subsurface layers following manufacturing processes such as machining, grinding, or additive manufacturing. It includes surface topography (roughness, waviness, and lay), residual stresses, microstructure alterations, and surface chemistry. In aviation, components like turbine blades, landing gear, and structural airframe parts operate under extreme conditions—high temperatures, cyclic loading, and corrosive environments—making surface integrity a determinant of component longevity and safety.
The concept of surface integrity was formalized in the 1960s by researchers like Michael Field and John Kahles, who recognized that machining processes could induce changes in a component's surface that affect its performance. For aviation parts, achieving optimal surface integrity involves balancing manufacturing efficiency with the need for surfaces that resist fatigue, wear, and environmental degradation. This article explores the multifaceted nature of surface integrity, detailing how various processing techniques influence it and how it is assessed in the context of aerospace applications.
Fundamentals of Surface Integrity
Definition and Components
Surface integrity is defined as the totality of attributes of a machined surface and its subsurface, including:
-
Surface Topography: Characteristics such as roughness (Ra, Rz), waviness, and lay, which describe the geometric features of the surface.
-
Residual Stresses: Internal stresses locked into the material after processing, which can be compressive (beneficial for fatigue resistance) or tensile (detrimental).
-
Microstructure: Changes in the material's grain structure, phase composition, or inclusions due to thermal or mechanical effects.
-
Surface Chemistry: Alterations in chemical composition, such as oxidation or contamination, that affect corrosion resistance.
-
Mechanical Properties: Hardness, toughness, and strength of the surface and subsurface layers.
These attributes collectively determine how a component will perform under operational stresses. For instance, compressive residual stresses can enhance fatigue life, while surface roughness may influence aerodynamic performance or wear behavior.
Importance in Aviation
Aviation components are subjected to cyclic loading, high temperatures, and corrosive environments, making surface integrity a critical factor in ensuring safety and reliability. For example:
-
Turbine Blades: Require smooth surfaces to minimize aerodynamic losses and compressive residual stresses to resist fatigue cracking.
-
Landing Gear: Must have high surface hardness and minimal defects to withstand impact loads and wear.
-
Airframe Structures: Need corrosion-resistant surfaces to endure environmental exposure over decades.
Poor surface integrity can lead to premature failure, such as fatigue cracks initiating from surface defects or corrosion pits, compromising aircraft safety. Consequently, aerospace standards like AS9100 emphasize surface integrity in quality control.
Factors Influencing Surface Integrity
Surface integrity is influenced by material properties, processing methods, and environmental conditions. Below, we explore these factors in detail.
Material Properties
The material composition and microstructure of aviation components significantly affect surface integrity. Common aerospace materials include:
-
Titanium Alloys (e.g., Ti-6Al-4V): Widely used for their high strength-to-weight ratio and corrosion resistance. However, titanium’s low thermal conductivity leads to high cutting temperatures, potentially causing surface burns or phase transformations.
-
Nickel-Based Superalloys (e.g., Inconel 718): Used in high-temperature applications like turbine blades. These alloys are difficult to machine, often resulting in work hardening and tensile residual stresses.
-
Aluminum Alloys (e.g., 7075-T6): Common in airframe structures due to their lightweight properties. Aluminum is prone to surface smearing during machining, affecting roughness.
-
Composites (e.g., Carbon Fiber Reinforced Polymers): Increasingly used in modern aircraft. Machining composites can cause delamination or fiber pullout, degrading surface integrity.
Each material responds differently to machining, requiring tailored processing parameters to achieve desired surface characteristics.
Processing Methods
The choice of manufacturing process profoundly impacts surface integrity. Key methods used in aviation parts processing include:
-
Turning: A subtractive process where a cutting tool removes material from a rotating workpiece. It can produce smooth surfaces but may induce tensile residual stresses if cutting parameters are not optimized.
-
Milling: Involves a rotating multi-tooth cutter. High-speed milling can improve surface finish but may cause thermal damage in heat-sensitive materials.
-
Grinding: Uses abrasive wheels to achieve fine surface finishes. It typically induces compressive residual stresses but can cause surface burns if coolant is inadequate.
-
Electrical Discharge Machining (EDM): A non-traditional method using electrical sparks to erode material. It produces a recast layer that may contain microcracks, affecting fatigue life.
-
Additive Manufacturing (AM): Techniques like selective laser melting (SLM) build parts layer by layer. AM surfaces often exhibit high roughness and residual stresses due to rapid solidification.
-
Shot Peening: A post-processing technique that bombards the surface with spherical media, inducing compressive residual stresses to enhance fatigue resistance.
Each method has unique effects on surface topography, residual stresses, and microstructure, necessitating careful selection based on the component’s requirements.
Environmental and Operational Factors
Environmental conditions during processing, such as coolant type and temperature, influence surface integrity. For example, dry machining may increase thermal damage, while improper coolant application can lead to chemical contamination. Post-processing storage conditions, such as exposure to humidity, can also initiate corrosion, degrading surface chemistry.
Operational factors, including tool wear, cutting speed, feed rate, and depth of cut, further affect surface integrity. For instance, worn tools increase surface roughness and induce tensile residual stresses, while high cutting speeds may cause thermal softening in some materials.
Measurement and Characterization of Surface Integrity
Accurate measurement of surface integrity is essential for quality control in aviation manufacturing. Various techniques are employed to assess different aspects of surface integrity.
Surface Topography Measurement
Surface topography is quantified using parameters like Ra (average roughness), Rz (maximum height of the profile), and Rsm (mean spacing of profile irregularities). Common measurement methods include:
-
Contact Profilometry: Uses a stylus to trace the surface, providing high-resolution roughness data. However, it may damage soft materials.
-
Optical Profilometry: Employs light-based techniques like white light interferometry to measure surface features non-destructively.
-
Scanning Electron Microscopy (SEM): Offers detailed imaging of surface defects and lay patterns.
Residual Stress Measurement
Residual stresses are measured using techniques such as:
-
X-Ray Diffraction (XRD): A non-destructive method that analyzes lattice strain to determine stress magnitude and direction. It is widely used in aerospace for its accuracy.
-
Hole Drilling: Involves drilling a small hole and measuring strain relaxation to calculate residual stresses. It is semi-destructive but cost-effective.
-
Neutron Diffraction: A specialized technique for measuring stresses in thick components, though it requires access to neutron sources.
Microstructure Analysis
Microstructural changes are assessed using:
-
Optical Microscopy: Reveals grain structure and surface defects.
-
Electron Backscatter Diffraction (EBSD): Provides detailed information on grain orientation and phase transformations.
-
Transmission Electron Microscopy (TEM): Offers high-resolution imaging of subsurface dislocations and inclusions.
Surface Chemistry Analysis
Surface chemistry is evaluated using:
-
Energy-Dispersive X-Ray Spectroscopy (EDS): Identifies elemental composition and detects contamination.
-
X-Ray Photoelectron Spectroscopy (XPS): Analyzes surface oxidation and chemical bonding.
Mechanical Property Testing
Surface hardness and toughness are measured using:
-
Vickers/Knoop Microhardness Testing: Quantifies hardness at specific depths.
-
Nanoindentation: Provides precise measurements of surface mechanical properties.
Impact of Surface Integrity on Aviation Component Performance
Surface integrity directly affects the performance of aviation components in several ways.
Fatigue Life
Fatigue failure, caused by cyclic loading, is a primary concern in aviation. Surface integrity influences fatigue life through:
-
Residual Stresses: Compressive stresses delay crack initiation, extending fatigue life. Tensile stresses, conversely, accelerate crack growth.
-
Surface Roughness: High roughness acts as stress concentrators, reducing fatigue life.
-
Microstructural Defects: Work-hardened layers or microcracks can serve as crack initiation sites.
For example, shot peening is commonly applied to landing gear components to induce compressive residual stresses, significantly improving fatigue resistance.
Corrosion Resistance
Aviation components are exposed to corrosive environments, such as salt spray or high-humidity conditions. Surface integrity affects corrosion resistance through:
-
Surface Chemistry: Oxidation or contamination can initiate pitting corrosion.
-
Surface Topography: Smooth surfaces are less prone to crevice corrosion than rough ones.
-
Residual Stresses: Tensile stresses can exacerbate stress corrosion cracking.
Proper surface treatments, such as anodizing for aluminum alloys or passivation for stainless steels, enhance corrosion resistance.
Wear and Friction
Surface integrity influences wear behavior in components like bearings and gears. Smooth surfaces and high hardness reduce adhesive and abrasive wear, while compressive residual stresses mitigate fretting fatigue.
Aerodynamic Performance
For components like turbine blades, surface roughness affects aerodynamic efficiency. High roughness increases drag and reduces fuel efficiency, necessitating ultra-smooth finishes achieved through processes like polishing or chemical milling.
Comparative Analysis of Processing Methods
To illustrate the impact of different processing methods on surface integrity, the following tables compare key attributes for common aerospace materials and processes.
Table 1: Surface Integrity Characteristics for Titanium Alloy (Ti-6Al-4V)
|
Process |
Surface Roughness (Ra, µm) |
Residual Stress (MPa) |
Microstructure Changes |
Typical Applications |
|---|---|---|---|---|
|
Turning |
0.8–2.0 |
+200 to -100 |
Work hardening, white layer |
Shafts, fittings |
|
Milling |
0.5–1.5 |
+150 to -50 |
Minor recrystallization |
Structural components |
|
Grinding |
0.2–0.6 |
-300 to -600 |
Surface burns possible |
Turbine blades |
|
EDM |
2.0–4.0 |
+100 to +300 |
Recast layer, microcracks |
Complex geometries |
|
Shot Peening |
1.0–2.5 |
-500 to -800 |
Compressive layer, no phase change |
Landing gear, fasteners |
|
Additive Mfg. |
5.0–15.0 |
+200 to +500 |
Porosity, rapid solidification |
Prototypes, complex parts |
Notes: Negative residual stress values indicate compressive stresses. Additive manufacturing data pertains to selective laser melting.
Table 2: Surface Integrity Characteristics for Nickel-Based Superalloy (Inconel 718)
|
Process |
Surface Roughness (Ra, µm) |
Residual Stress (MPa) |
Microstructure Changes |
Typical Applications |
|---|---|---|---|---|
|
Turning |
1.0–2.5 |
+300 to +100 |
Severe work hardening |
Turbine disks |
|
Milling |
0.7–2.0 |
+200 to 0 |
Grain distortion |
Combustor components |
|
Grinding |
0.3–0.8 |
-400 to -700 |
Thermal damage possible |
Turbine blades |
|
EDM |
2.5–5.0 |
+150 to +400 |
Recast layer, heat-affected zone |
Intricate cooling channels |
|
Shot Peening |
1.5–3.0 |
-600 to -900 |
Compressive layer |
High-pressure turbine parts |
|
Additive Mfg. |
6.0–20.0 |
+300 to +600 |
Columnar grains, porosity |
Rapid prototyping |
Notes: Inconel 718’s high hardness makes it prone to tool wear, affecting surface finish.
Table 3: Surface Integrity Characteristics for Aluminum Alloy (7075-T6)
|
Process |
Surface Roughness (Ra, µm) |
Residual Stress (MPa) |
Microstructure Changes |
Typical Applications |
|---|---|---|---|---|
|
Turning |
0.6–1.8 |
+100 to -50 |
Smearing, minor hardening |
Airframe panels |
|
Milling |
0.4–1.2 |
+80 to -30 |
Surface recrystallization |
Wing skins |
|
Grinding |
0.1–0.5 |
-200 to -400 |
Minimal thermal effects |
Precision fittings |
|
EDM |
1.5–3.5 |
+50 to +200 |
Recast layer, minor cracks |
Molded components |
|
Shot Peening |
0.8–2.0 |
-300 to -500 |
Compressive layer |
Structural joints |
|
Additive Mfg. |
4.0–12.0 |
+150 to +400 |
Porosity, anisotropic grains |
Lightweight prototypes |
Notes: Aluminum alloys are sensitive to machining-induced smearing, requiring careful coolant application.
These tables highlight the trade-offs between surface finish, residual stresses, and microstructural effects, guiding process selection for specific aviation components.
Advanced Processing Techniques for Enhanced Surface Integrity
Recent advancements in manufacturing have introduced techniques to improve surface integrity, particularly for high-performance aviation parts.
Laser-Based Processes
-
Laser Peening: Uses high-energy laser pulses to induce deep compressive residual stresses, surpassing the depth achieved by shot peening. It is ideal for critical components like turbine blades.
-
Laser Polishing: Reduces surface roughness by melting and resolidifying the surface layer, improving aerodynamic performance.
-
Laser Cladding: Deposits material to repair or enhance surfaces, maintaining base material properties.
Cryogenic Machining
Cryogenic machining uses liquid nitrogen or carbon dioxide as a coolant, reducing cutting temperatures. This minimizes thermal damage, improves surface finish, and induces compressive residual stresses, particularly for titanium and nickel alloys.
Hybrid Manufacturing
Hybrid processes combine additive and subtractive methods, such as integrating 3D printing with CNC machining. This approach allows for complex geometries while achieving high surface integrity through post-processing.
Surface Coatings and Treatments
-
Physical Vapor Deposition (PVD): Applies thin, hard coatings like titanium nitride to enhance wear and corrosion resistance.
-
Plasma Nitriding: Diffuses nitrogen into the surface to increase hardness and fatigue resistance.
-
Anodizing: Creates a protective oxide layer on aluminum alloys, improving corrosion resistance.
These techniques are increasingly adopted to meet the stringent requirements of modern aviation components.
Challenges in Achieving Optimal Surface Integrity
Despite advancements, several challenges persist in achieving optimal surface integrity:
-
Material Variability: Inconsistent material properties, such as inclusions or varying hardness, can lead to unpredictable surface outcomes.
-
Process Control: Maintaining consistent cutting parameters across large production runs is difficult, especially for difficult-to-machine materials.
-
Cost vs. Performance: High-integrity processes like laser peening are expensive, requiring justification for cost-sensitive applications.
-
Environmental Regulations: Restrictions on coolants and coatings necessitate eco-friendly alternatives without compromising surface quality.
Addressing these challenges requires ongoing research and collaboration between industry and academia.
Future Trends in Surface Integrity for Aviation
The aerospace industry is evolving rapidly, driven by demands for fuel efficiency, sustainability, and advanced materials. Future trends in surface integrity include:
Digital Twin Technology
Digital twins—virtual models of physical components—enable real-time monitoring of surface integrity during manufacturing. By integrating sensor data and predictive algorithms, manufacturers can optimize process parameters to achieve desired surface characteristics.
Artificial Intelligence and Machine Learning
AI and ML algorithms analyze vast datasets from machining processes to predict surface integrity outcomes. These tools can recommend optimal cutting parameters, reducing trial-and-error and improving consistency.
Sustainable Manufacturing
Eco-friendly processes, such as dry machining and biodegradable coolants, are gaining traction to meet environmental regulations while maintaining surface integrity.
Advanced Materials
The adoption of new materials, such as ceramic matrix composites (CMCs) and high-entropy alloys, poses new challenges for surface integrity. Tailored processing methods are being developed to address their unique properties.
In-Situ Surface Monitoring
Real-time measurement techniques, such as laser interferometry and acoustic emission sensing, allow for immediate detection of surface defects during processing, enabling corrective actions.
Case Studies in Aviation Surface Integrity
Case Study 1: Turbine Blade Manufacturing
Turbine blades in jet engines require ultra-smooth surfaces and compressive residual stresses to withstand high temperatures and cyclic loading. A typical manufacturing process involves:
-
Rough Machining: High-speed milling to shape the blade from a nickel-based superalloy forging.
-
Finish Grinding: Achieves Ra < 0.4 µm to minimize aerodynamic losses.
-
Shot Peening: Induces compressive stresses up to -800 MPa to enhance fatigue life.
-
Thermal Barrier Coating: Applied via PVD to protect against oxidation.
Post-processing inspection using XRD and optical profilometry ensures compliance with aerospace standards. This process has reduced blade failures by 30% in modern engines.
Case Study 2: Landing Gear Surface Treatment
Landing gear components, made from high-strength steels or titanium alloys, undergo shot peening to improve fatigue resistance. A recent study compared shot peening with laser peening:
-
Shot Peening: Induced compressive stresses to a depth of 0.2 mm, improving fatigue life by 50%.
-
Laser Peening: Extended compressive stresses to 1.0 mm, increasing fatigue life by 80% but at a higher cost.
The choice of laser peening for critical components reflects the industry’s prioritization of safety over cost.
Case Study 3: Additive Manufacturing of Structural Components
Additive manufacturing of aluminum alloy airframe parts has introduced challenges in surface integrity. SLM-produced parts exhibit Ra values of 10–15 µm, necessitating post-processing like abrasive flow machining to achieve Ra < 1.0 µm. Ongoing research aims to optimize AM parameters to reduce initial roughness.
Conclusion
Surface integrity is a cornerstone of aviation parts processing, influencing the performance, safety, and longevity of critical components. By understanding the interplay of material properties, processing methods, and measurement techniques, manufacturers can achieve surfaces that meet the aerospace industry’s rigorous demands. Advances in laser-based processes, cryogenic machining, and digital technologies promise to further enhance surface integrity, while challenges like cost and sustainability require innovative solutions. As aviation continues to evolve, surface integrity will remain a focal point for ensuring the reliability and efficiency of next-generation aircraft.
This article has provided a detailed exploration of surface integrity, supported by comparative data and real-world applications. Continued research and technological advancements will drive improvements in this critical field, safeguarding the future of aerospace engineering.
Reprint Statement: If there are no special instructions, all articles on this site are original. Please indicate the source for reprinting:https://www.cncmachiningptj.com/,thanks!
 3, 4 and 5-axis precision CNC machining services for aluminum machining, beryllium, carbon steel, magnesium, titanium machining, Inconel, platinum, superalloy, acetal, polycarbonate, fiberglass, graphite and wood. Capable of machining parts up to 98 in. turning dia. and +/-0.001 in. straightness tolerance. Processes include milling, turning, drilling, boring, threading, tapping, forming, knurling, counterboring, countersinking, reaming and laser cutting. Secondary services such as assembly, centerless grinding, heat treating, plating and welding. Prototype and low to high volume production offered with maximum 50,000 units. Suitable for fluid power, pneumatics, hydraulics and valve applications. Serves the aerospace, aircraft, military, medical and defense industries.PTJ will strategize with you to provide the most cost-effective services to help you reach your target,Welcome to Contact us ( [email protected] ) directly for your new project.
- 5 Axis Machining
- Cnc Milling
- Cnc Turning
- Machining Industries
- Machining Process
- Surface Treatment
- Metal Machining
- Plastic Machining
- Powder Metallurgy Mold
- Die Casting
- Parts Gallery
- Auto Metal Parts
- Machinery Parts
- LED Heatsink
- Building Parts
- Mobile Parts
- Medical Parts
- Electronic Parts
- Tailored Machining
- Bicycle Parts
- Aluminum Machining
- Titanium Machining
- Stainless Steel Machining
- Copper Machining
- Brass Machining
- Super Alloy Machining
- Peek Machining
- UHMW Machining
- Unilate Machining
- PA6 Machining
- PPS Machining
- Teflon Machining
- Inconel Machining
- Tool Steel Machining
- More Material

